Now that you are familiar with the command buttons, let’s look at the rest of the Print Options sheet.
The Print Column
To begin building your print job, you need to tell Insight which sheets in the workbook you would like to include in your Print Job.
In the top left hand corner of the sheet, there is a "Print" column. This column contains a series of toggle buttons that control whether or not the corresponding item on that row will print in your Print Job.
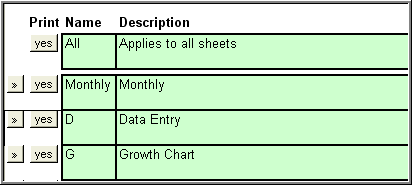
The toggle button on at the very top of the column controls all of the print buttons in the column beneath it. For example, if the button is marked ”no” and you click on it once, the text on the button changes to "yes" and the all of the buttons underneath change to ”yes” as well. This means that all of the sheets in your workbook will print when you use the print command.
If we were to click on the button again, so that ”no” was displayed, then none of the sheets in the workbook would print when you used the print command.
You can still individually change the toggle button for each row as desired to control printing for each row. Using these buttons, you can select the individual charts that you wish to print.
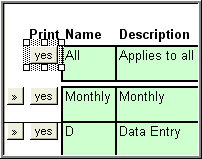
The "Go To" Buttons
Notice
the  buttons to
the left of the print buttons.
buttons to
the left of the print buttons.
Clicking on any of these ”Go To” buttons will take you to the corresponding sheet in the workbook. This might come in handy if you aren’t familiar with the worksheet name.
Footer Columns
Let’s take a look at the Footer columns. These columns control the content that you have in the footers that will print on the bottom of each page of your print job.
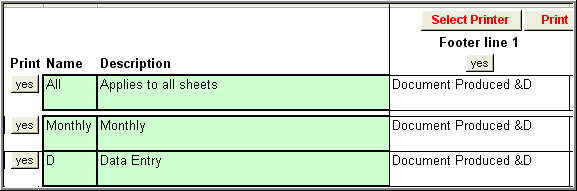
Notice the text that is currently displayed in this line - "Document Produced &D." (Note: The &D is a code that inserts the current date, so the first line of the footer would actually say Document Produced 12/31/2006.) Unless you change it, this text will print in the first line of your footer, on every page of your print job. You have several options:
You can choose to print this text that is displayed in this line. If the button just below the text, "Footer Line 1” is set to yes, then this footer line will print on every page of your print job.
You can change the text in this line. Just type over the text that you want to replace. Hit the enter button when you are done. After you edit the footer information, you will be asked, ”do you want to use this value for all sheets?” If you choose yes, all the 1st footer rows for all pages will change. (Remember, you can have as many different print jobs as you would like.)
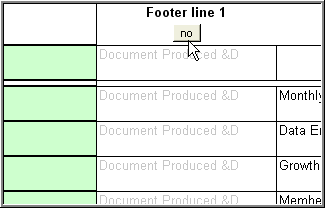
If you do not want to print anything in the first footer line, toggle the ”yes” button at the top of the column over to "no." All of the information displayed in the Footer 1 column will fade. This line of the footer will not be displayed in your print job. Footer lines 2 and 3 work in the exact same manner as Footer line 1.
Page Numbering
You can choose whether or not to display page numbers in your print job. If you do not want the page numbers to print, toggle the ”yes” button at the top of the column over to "no." All of the information displayed in this column will fade and the page numbers will not print.
You can change the starting page number of your print job. See Assign Page Numbers.
Congratulations! You are ready to begin creating your own print jobs!